The Mumbai to Sydney flight is a popular long-haul route connecting two vibrant cities: Mumbai’s bustling energy and Sydney’s iconic harbour views. Covering roughly 10,200 km, the journey typically takes 13–18 hours depending on the airline and whether it’s a connecting or direct option (spoiler: no true nonstop flights exist right now in 2026, but some carriers offer efficient one-stop paths). Most Mumbai to Sydney flights involve at least one layover, with options for connecting flights through major hubs, and direct flights are currently unavailable. Whether you’re travelling for business, family, solo adventure, or a vacation, the airline you choose shapes your entire experience — from check-in and boarding to meals, entertainment, comfort, and how you handle jetlag across time zones. Here’s a realistic spotlight on the top airlines flying this route, their key service differences, and what makes each stand out for different types of passengers.
Air India: The Value-Focused Option with Generous Baggage
Air India often appears in searches for cheap fares and has strong connectivity on India-Australia routes. While not always the fastest, they provide solid economy options with baggage allowance that’s family-friendly (often 30kg+ checked). Air India’s Mumbai to Sydney flights typically include a layover, which may affect the total travel time.
Economy: Indian-inspired meals shine (great veg/non-veg choices), personal screens for entertainment, and decent legroom on modern aircraft.
Business Class: Lie-flat seats on select flights, priority services, and lounge access at Mumbai Airport (BOM).
Pros: Competitive airfare, good for budget travellers or those needing extra luggage.
Cons: Service consistency can vary; occasional delays on busy days.
Best for: Families, backpackers, or anyone prioritising cost over luxury.
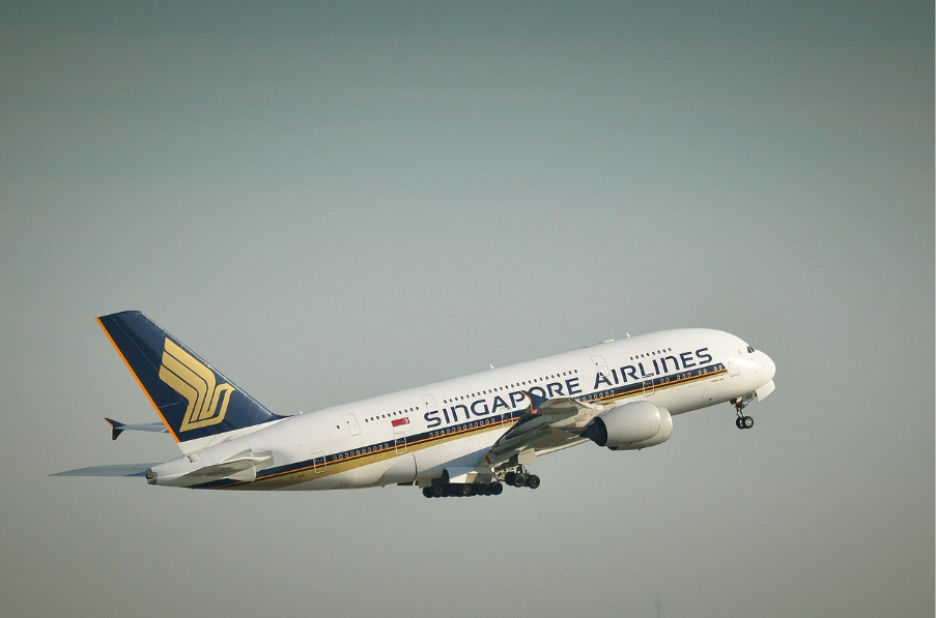
Singapore Airlines: Premium Comfort King
Consistently ranked among the world’s best, Singapore Airlines via Singapore (Changi) offers one of the smoothest connecting experiences (total ~16–18 hours). Singapore Airlines offers a seamless connecting flight experience through Changi Airport.
Economy: Excellent 32-inch pitch, top-tier in-flight meals (pre-order Book the Cook), and KrisWorld entertainment system loaded with movies/TV.
Premium Economy: Wider seats, footrests, upgraded dining — a sweet spot for long-haul comfort.
Business Class: Lie-flat beds, direct aisle access, gourmet food/wine, and stellar service.
Pros: Attentive crew, clean cabins, easy transit at Changi (with lounges and gardens).
Cons: Higher price than budget options.
Best for: Business travellers, couples, or anyone wanting a refined journey.
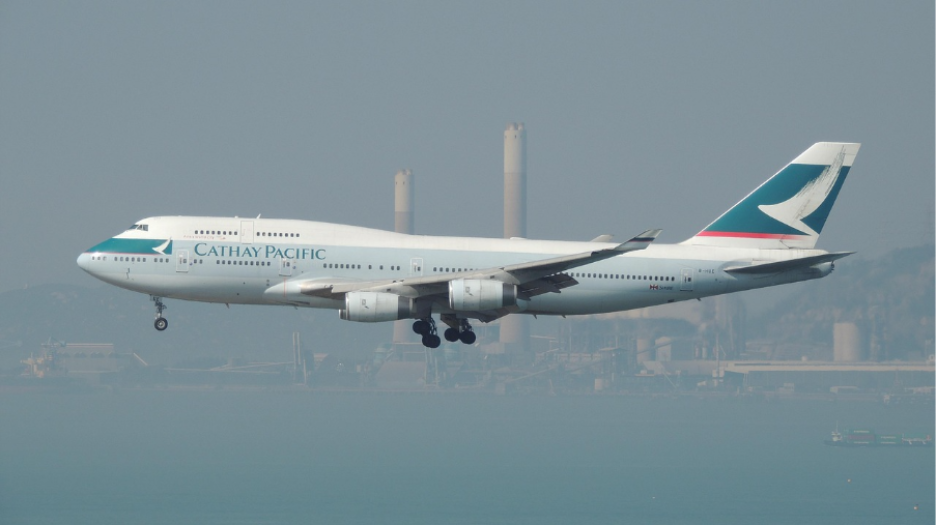
Cathay Pacific: Balanced Luxury via Hong Kong
Cathay via Hong Kong delivers strong all-round performance with short layovers. Cathay Pacific’s stopover in Hong Kong is often brief and efficient.
Economy: Good legroom, Asian-fusion meals, and solid IFE.
Premium Economy/Business: Spacious seats, priority boarding, and excellent amenity kits.
Pros: Reliable on-time performance, great wifi options.
Cons: Layover can add time if not timed well.
Best for: Foodies and those who like Asian hospitality.
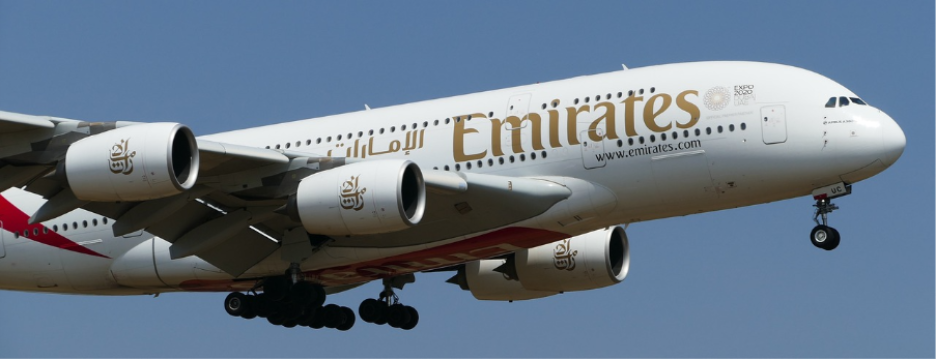
Emirates & Qatar Airways: Lavish Stopover Vibes
These Middle Eastern giants (via Dubai/Doha) turn the trip into a mini-adventure. The transit experience in Dubai or Doha offers access to world-class lounges and shopping.
Economy: Generous baggage, hearty meals, and ice entertainment systems.
Business Class: Suites with privacy doors (Emirates), or Qsuites (Qatar) — among the best in the sky.
Pros: Stunning lounges, onboard showers (Emirates A380), and shopping at layovers.
Cons: Longer total duration (18+ hours).
Best for: Luxury seekers willing to pay for extras.
Malaysia Airlines: Underrated Value with Comfort
Via Kuala Lumpur, Malaysia Airlines offers competitive deals with warm service. Malaysia Airlines often features attractive return flight deals for Mumbai to Sydney travelers.
Economy: Tasty meals, decent comfort.
Business: Lie-flat seats and good value.
Pros: Often cheaper than premium carriers.
Cons: Less frequent flights.
Best for: Budget luxury hunters.
Other Notes: Qantas Codeshares, Etihad, Thai Airways
Many itineraries include Qantas codeshares for Australian touch (loyalty perks), while Etihad and Thai add variety. Peak season (Australian summer Dec–Feb, Indian festivals) pushes prices up; offseason (April–June, Sept–Oct) brings better availability and lower fares. Always check visa requirements, passport validity, immigration, and customs requirements early.
Why Choose Gaura Travel for Your Mumbai to Sydney Flight?
Comparing airlines is one thing; getting the best deal without the hassle is another. Gaura Travel specialises in India-Australia travel since 2007, making us your go-to for smart booking. We tailor your itinerary for the smoothest departure from Mumbai, arrival at Sydney Airport, and minimal jet lag.
GDeals – Exclusive Mumbai to Sydney Deals
Our GDeals unlock fares you won’t find elsewhere — economy from AUD $499 return, premium economy upgrades, and business class steals on top carriers like Singapore Airlines, Emirates, Cathay, and more. Includes solid baggage, meals, and no surprise fees.
Buy Now Pay Later
Secure your tickets with just AUD $5 upfront. Spread the rest over weekly/fortnightly payments which are ideal for family, holiday, or adventure plans when cash is tight, but you want to lock availability. This installment option makes it easier to manage your travel budget.
24/7 Expert Support & More
Real humans (Hindi & English) compare options, handle reschedule, refund, or upgrade requests, and add insurance, hotels, or packages. Price alerts notify you of drops; we ensure transparent cost with all taxes shown.
Whether solo, family, or business, we tailor your itinerary for the smoothest departure from Mumbai, arrival at Sydney Airport, and minimal jet lag. Ready to fly from Mumbai to Sydney smarter? Call 1300 359 463 or visit gauratravel.com.au. Share your dates, group size, and preferences, and we’ll find the perfect airline, cabin, and deal in minutes.
There’s a unique kind of excitement that bubbles up when you start planning a trip to India. The vibrant colours, the tantalising smells of street food, the incredible history, and, for many Australians, the deep-seated joy of reconnecting with family and friends. It’s a journey that touches your soul, a holiday that creates lifelong memories, or perhaps a special occasion like a family wedding or a festive celebration like Diwali.
But then, that excitement can sometimes be replaced by a familiar travel anxiety: the visa process. We’ve all heard the stories: the last-minute panic, the frantic checking of inboxes, the nagging worry that a simple document could derail months of planning. Whether you’re applying for an e-Tourist visa for India or need information from the India passport and visa application centre in Brisbane, proper planning is essential.
This comprehensive guide is here to walk you through everything you need to know about the Indian e-visa process, revealing the secrets to a stress-free experience and, crucially, how to avoid those dreaded last-minute travel issues. Understanding the processing time for an e-Visa for India can make all the difference in your travel planning.
And as you embark on this adventure, you’ll want a reliable partner by your side. For over 18 years, Gaura Travel has been a trusted name in the Australian-Indian community, helping over 3 lakh travellers find their way home.
Here are some of the key reasons why Gaura Travel stands out:
Alt: how gaura travel stands out
1. AffordableGDeals with Premium Airlines: Gaura Travel specializes in sourcing exclusive flight deals that are often not available to the public. They partner with premium international airlines like Qantas, Malaysia, Singapore Airlines, and Cathay Pacific to offer competitive prices without compromising on quality or service. Whether you’re flying from Melbourne, Sydney, Brisbane, Adelaide, or Perth, they have deals for all major routes to India.
2.Book Now, Pay Later: This is a huge benefit for anyone trying to manage their travel budget. You can secure your flight ticket by paying just $5 and splitting the remaining balance in easy instalments starting from just $20 per week. This flexible payment option takes the financial pressure off and allows you to lock in a great price without having to pay the full amount immediately.
3. Generous Inclusions: Their fare comes with a 30 KG luggage allowance, in-flight meals, and on-board entertainment, so you don’t have to worry about extra costs or a long, boring flight. It’s a key benefit that makes a world of difference, especially when you’re carrying gifts for family or souvenirs back home.
4. Dedicated 24/7 Customer Support: Travel plans can be unpredictable. Flights get delayed, itineraries change, and questions pop up at all hours. Gaura Travel’s commitment to 24/7 customer support means you have a real person to talk to, no matter the time zone, for any query or emergency. For any travel related support, call us at: 1300 359 463.
5. Over 3 Lakh Satisfied Travellers: Their long history and extensive customer base speak for themselves. With over 300,000 travellers served, they have a proven track record of helping people get to India safely and efficiently.
6. 18 Years of Service: With almost two decades of experience, Gaura Travel has a deep understanding of the travel needs and preferences of the Indian diaspora in Australia. This long history is a testament to their reliability and expertise.
They understand that a trip to India is more than just a flight; it’s a journey home.
Understanding the Indian E-Visa: Your Digital Gateway
Alt: e tourist visa for india
Gone are the days of making physical visits to consulates or standing in long queues. The e-visa system, introduced by the Indian government, has truly revolutionized the application process. It’s a digital gateway that allows tourists, business travellers, and those seeking medical treatment to apply for an e-Tourist visa for India from the comfort of their homes. The entire process, from submitting documents to making payments, is handled online.
However, “convenient” doesn’t always mean “instant.” While the e-visa aims for efficiency, various factors can influence processing times. Understanding these factors is the key to a stress-free trip.
The Typical Processing Times: What to Expect
Let’s start with the good news. Generally, the processing time for an e-Visa for India is within 24 to 72 hours. This is the widely advertised timeframe and often holds true for the vast majority of applicants. Many travellers are pleasantly surprised to receive their Electronic Travel Authorization (ETA) within just 1-2 business days. It’s incredibly fast, but it’s important to remember that this is an average and not an absolute guarantee. Several scenarios can cause your application to fall outside this typical window.
Factors Influencing E-Visa Processing Time
To truly avoid last-minute issues, it’s vital to be aware of what can speed up or slow down your application. A little knowledge here goes a long way.
1. The Accuracy of Your Application: A Detail-Oriented Game
This is, without a doubt, the most significant factor. The e-Tourist visa for India system is automated, and a minor error can be a major hurdle.
a. Incorrect Personal Details: This is the most common reason for delays. A mismatched name (e.g., using a nickname instead of your full legal name as it appears on your passport), an incorrect date of birth, or a wrong passport number can cause your application to be flagged for manual review or outright rejected. Before you submit, cross-reference every single field with your passport.
b. Blurry or Non-Compliant Photos: The e-Tourist visa for India requires a specific passport-style photograph. It must be a recent photo (within the last 6 months), taken against a plain white background, and show your full face clearly without shadows. Blurry images or photos with a busy background will result in a request for resubmission, adding precious time to your wait.
c. Improper Passport Scan: Your passport scan must be of the personal information page, perfectly clear, with all details visible and no glare. The file size and format requirements are specified on the e-visa portal; pay close attention to these rules.
2. The Completeness of Your Documents
While the tourist e-visa application is relatively straightforward, if you’re applying for a business or medical e-visa, you’ll need to provide additional supporting documents. Leaving any mandatory field blank or failing to upload the required files will immediately halt your application. Always double-check the specific requirements for your visa type.
3. The Time of Your Application
a. Weekends and Public Holidays: Applications submitted on weekends or during major Indian public holidays (like Diwali, Holi, or Independence Day) will only begin processing on the next working day. This can affect the overall processing time for the e-Visa for India, so factor this into your timeline.
b. Peak Travel Seasons: During peak tourist seasons (especially from October to March), the sheer volume of applications can lead to minor delays. The system gets a little crowded, so give it some extra breathing room.
4. Security Checks and Manual Review
All visa applications undergo a thorough security screening process. While most are cleared automatically, if your application triggers any flags or requires additional verification from a consular officer, processing will naturally take longer. This is a normal part of the process, though it’s less common for the average tourist.
Your Robust Action Plan to Avoid Last-Minute Panic
Now that you know the potential pitfalls, here’s your powerful action plan to ensure a smooth, stress-free e-visa experience.
1. Apply Well in Advance (The Golden Rule)
This is the single most important piece of advice anyone can give you. Don’t wait until the last minute. While the processing time for the e-Visa for India can be quick, a technical glitch or a minor error can throw a spanner in the works. We recommend applying at least 2-3 weeks before your intended travel date. This buffer gives you ample time to address any potential issues without panicking. Applying a month out is even better!
2. Create a Digital Checklist
Before you even open the application form, have your documents ready. This includes a clear digital photo and a scan of your passport’s information page. Ensure they meet the specified file size and format (usually JPEG/JPG). There are many free online tools that can help you resize and format your photos correctly. If you’re in Brisbane and need additional support, the India passport and visa application centre in Brisbane can provide guidance on document requirements.
3. Meticulously Review, Then Review Again
Don’t just rely on your own eyes. After you’ve filled out the form, get a friend or family member to review it. A fresh pair of eyes can often spot errors that you’ve overlooked.
4. Monitor Your Email and Application Status
After submitting, keep a close eye on your email for the ETA. You can also check the status of your application on the official e-visa website using your Application ID. If you don’t receive the email within the typical 72-hour window, check the status online before panicking.
5. Print and Carry Your Documents
Once your e-visa is approved, you will receive an ETA. Print a physical copy of this document and carry it with you at all times during your travel, along with a copy of your passport. You will be asked to present these upon arrival in India.
Concluding Remark
In conclusion, the Indian e-visa system has made travel to this incredible country more accessible than ever. By understanding the process, planning ahead, and being meticulous with your application, you can easily avoid the stress of last-minute delays. With your visa secured and your flights booked with a trusted partner like Gaura Travel, all that’s left is to pack your bags and prepare for a journey of a lifetime. The vibrant colours of India are waiting for you.
FAQ
1. What are the different types of e-visa available for foreign nationals visiting India?
India offers several e visa types including e-Tourist visa, e-Business visa, e-Medical visa, e-Medical attendant visa, and e-Conference visa. Each category serves specific purposes – from casual visits and business meetings to medical treatment and conference attendance. International travellers can choose the appropriate visa type based on their sole objective for the visit.
2. What are the applicable e visa fees for different visa categories?
The e visa fee varies depending on the visa category and nationality. All visa fees are non refundable once payment is processed, regardless of whether the application is approved or rejected. You can link verify payment status and check payment status updating through the official e-visa portal. The fees cover processing costs for reviewing all these documents and conducting security checks.
3. What documents are required for the online visa application?
Essential required documents include a valid passport with at least six months validity beyond your arrival date, recent photograph meeting specifications, and the photo page of your passport. For e-Medical visa applications, you need an invitation letter from a recognized Indian hospital. E-Medical attendant applicants must provide proof of relationship with the e medical visa holder. All uploaded documents must be in PDF, JPG, or PNG format.
4. Can I apply for multiple entries or double entry with an e-Visa?
Yes, certain e-Visa categories allow multiple entries. E-Business visa typically permits multiple entries for one year, while e-Medical visa allows triple entry for 60 days. Tourist e-Visas may offer double entry depending on the duration selected. However, some categories like one-month tourist visas are single entry only.
5. Do I need yellow fever vaccination card if traveling from yellow fever affected countries?
Yes, travellers arriving from yellow fever affected countries must carry a valid yellow fever vaccination card at the time of arrival in India. Without this documentation, you may be quarantined for up to 6 days upon arrival. This requirement applies to all foreign nationals regardless of their e visa type.
6. Can I enter India if I have a new passport but my valid visa was issued on my old passport?
Yes, you can enter India with a new passport even if your valid visa was issued on the old passport. However, you must carry both passports – the new one for travel and the old one containing the valid Indian visa. Immigration officers will verify both documents to confirm your eta status.
7. What is the difference between e-Medical and e-Medical attendant visas?
An e-Medical visa is for patients seeking medical treatment in India, while an e-Medical attendant visa is for family members or companions accompanying the patient. The e-Medical attendant visa has validity co terminus with the patient’s medical visa. Maximum two attendants per patient are allowed, and the hospital must include the attendant’s name in the invitation letter.
8. Do I require prior permission for certain countries or specific activities?
Some nationalities and activities do require prior permission from civil authority or need political clearance. Pakistani nationals and those of Pakistani origin must apply for regular visa through Indian missions and cannot use the e-visa facility. Certain restricted areas may require additional permits beyond the standard indian visa.
9. Can I extend my e-Visa or convert it to a different type after arrival?
Most e-Visas are non refundable and non-extendable. However, in exceptional circumstances like medical emergencies, you may be able to extend or convert your visa through the Foreigners Regional Registration Office (FRRO). For employment visa or long-term stays, you must apply for appropriate visa categories before travel.
10. What should I do after the final submission of my online application?
After final submission, monitor your email and check payment status updating regularly. Foreigners applying can track their application status using the Application ID provided. Once approved, print your Electronic Travel Authorization (ETA) and ensure your return ticket and other travel documents are ready. Remember to select arrival date within the visa validity period and use only designated entry points for e-Visa holders.
Planning an exciting trip abroad? Before you pack your bags and book those dream flights, there’s one essential thing: getting your visa sorted. Navigating the visa process can be confusing, especially with different rules for each country and type of trip. But don’t worry! With the right info, you’ll glide through the process and be on your way to your next adventure without a hitch. Whether you’re heading on a beach vacation, a business trip, or something in between, having your visa in place will help make your travels stress-free.
Understanding Visa Types
Tourist Visas
Dreaming of a relaxing holiday? If you’re off for some leisure time, you’ll need a tourist visa. Usually, it’s as simple as having a valid passport, your travel plans, and maybe proof of where you’ll be staying. The key here is to apply early—visa processing times can surprise you, especially if you’re heading to a popular destination during the busy season.
Business Visas
If your trip is more about meetings and networking than sightseeing, you’ll need a business visa. These often require a bit more paperwork, like an invitation from the company you’re visiting and some proof of funds. The upside? Business visas often allow multiple entries, so if your work trips are frequent, you’re covered for a while.
Transit Visas
Got a long layover in a country before reaching your final stop? You might need a transit visa. These are short-term visas, just enough to allow you to switch flights or explore a bit if you’ve got time between connections. Be sure to check if your layover country requires one before you travel!
Long-term Visas
Planning to stay longer than just a holiday? Maybe you’re heading off for work, studies, or to start a new life abroad. In that case, you’ll need a long-term visa, like a work or student visa. This can require a lot more documentation, such as sponsorship letters or proof of enrollment in an institution, so it’s best to get started as early as possible.
The Application Process
Step-by-step Guide
Don’t let the visa process intimidate you—here’s a simple breakdown of how to tackle it:
Do Your Research: Every country is different, so start by checking what kind of visa you need.
Prepare Your Docs: Your passport, recent photos, a travel itinerary, and proof of funds are usually required.
Fill Out the Forms: Complete the visa application, which you can often do online.
Submit and Pay: Pay the fee and submit your application—either online or in person, depending on your destination.
Wait for Approval: Patience is key! Once your visa is approved, you’re all set.
Common Documents You’ll Need
A passport that’s valid for at least six months.
Recent passport-sized photos.
Proof that you have enough funds to support your stay.
Your travel itinerary with flight and accommodation details.
Online vs. In-person Applications
These days, you can often apply for visas online, making it super convenient. Some countries still require you to head to the nearest embassy or consulate for an in-person application, especially for more complex visas. Online applications tend to be faster, but in-person appointments can offer peace of mind if you prefer that personal touch.
Tips for a Smooth Visa Experience
Check Your Passport: Is your passport valid for at least six months? If not, renew it before applying!
Apply Early: Don’t wait until the last minute. Visa processing times can vary, so give yourself plenty of time.
Stay Updated: Visa requirements can change, so double-check everything, especially if you’re traveling to multiple countries.
Common Pitfalls to Avoid
Incomplete Applications: Triple-check that you’ve included everything! Missing a document could delay your approval.
Processing Time Overlooked: Visa approvals can take time, so plan and avoid last-minute scrambles.
Mismatched Requirements: Always verify the visa requirements specific to your nationality and the purpose of your visit.
Helpful Resources
Official Government Websites: Always use official government websites for visa information.
Visa Check Tools: Many websites offer handy visa checkers where you can input your nationality, and travel plans to get the specific requirements.
Travel Communities: Join travel forums and groups to hear firsthand from others who’ve been through the process and can offer real advice.
FAQs Section:
Do I really need a visa for my trip?
Yes, most international trips require some form of visa. Make sure you know the rules for your destination.
What if I don’t apply early enough?
That can be risky! Always give yourself plenty of time before your trip to apply, as some visas take weeks to process.
Personal Experiences:
Here’s what Sarah had to say after getting her visa:
“I used to find the whole visa process stressful, but after using online tools and applying early, it became a breeze. My biggest tip? Don’t leave anything to the last minute!”
Visa Quiz:
What’s the purpose of your trip?
A) Leisure / Vacation
B) Business
C) Study
D) Layover (transit)
Answer:
If A: You’ll need a Tourist Visa.
If B: Go for a Business Visa.
If C: A Student Visa is required.
If D: A Transit Visa might be needed.
Conclusion
A little planning goes a long way when it comes to visas! By staying organized and applying early, you can avoid unnecessary stress and focus on the fun part—exploring new places. Wherever you’re heading, whether it’s for business, leisure, or study, being prepared with the right visa will set you up for smooth travels.
For more information, consult visa experts or check official resources. Safe travel!